What is Selenium IDE?
Selenium IDE (Integrated Development Environment) is a record and playback automation tool. It allows users to create test scripts through recording and playback the recorded tests, debug and analyze test results. Testers with no programming knowledge can use this tool seamlessly by recording and playing back the repetitive regression tests. Every tool has benefits as well as limitations and people can choose it according to their requirements and how beneficial it is for them. Following is the list of Benefits and Limitations of Selenium IDE.
Benefit and Limitations
Let’s first go through the list of Benefits of Selenium IDE:
Benefits
Quick and Easy to use – Selenium IDE takes very little time to install and start using. Its basic point and click interface makes it easy to quickly record and run automated tests without writing any code.
User-Friendly – Its graphical user interface provides a smooth user experience. The user can easily build scripts, debug and add it to a test suite and run the scripts.
Platform Independence – Selenium IDE tests can be run on any platform that supports a web browser. Hence, it is not limited to any operating system.
Limitations
Difficult Complex Tests – Selenium IDE cannot support complex scenarios, like data driven testing. This makes it difficult to automate tests that require a large amount of data.
Browser Dependent– Selenium IDE tests are browser-dependent. Currently, it supports only Chrome and Firefox.
Weak Report – Selenium IDE’s default test reports are weak and do not provide a detailed report needed for deeper analysis.
Limited Capabilities – Selenium IDE provides limited capabilities compared to other test automation tools. It cannot be used for performance and load testing, making it unsuitable for larger applications.
Locator Strategies
Like Selenium WebDriver, Selenium IDE also supports almost all the major locator strategies, however the usage is different for this tool. It also automatically locates and provides us the locators when we record the tests using the tool. However, it is good to learn about the locator strategies so if required we can update them manually as per our need.
Five types of locators strategies can be used with Selenium IDE:
1. ID
ID locator looks for the ID attribute to locate an element on the web page.
Example: The email id field has the following line of code in the DOM(This code will be referred to the examples for all locators mentioned below):
<input type=”email” id=”userId” name=”userId” placeholder=”Email”>
Email field can be located by providing the id locator as id=’userId’ .
2. Name
Name locator looks for the Name attribute to locate an element on the web
page. Likewise, by providing the name locator as name=’userId’ Email Id field can be located.
3. CSS Selector
This locator uses the CSS Selectors to locate an element on the web page. Email field can be located by using the CSS Selector- css=input#userId
4. XPath
XPath expressions are used for locating an element on the web page.
Email field can be located by using the XPath – xpath=//\[@id=”userId”]*
5. Link Text
This locator will look for the link to locate the element on the web page. It works with links only. Links can be located using full link text as well as partial link text.
Example: Link name is “Forgot Password”.
linktext=“Forgot Password” will check for full link text to be “Forgot Password”, whereas with partial link text the value “Forgot” can be provided to locate the element and it will locate the link “Forgot Password”.
Let’s now move towards the IDE commands and check out some useful commands offered by Selenium IDE to automate the web page.
IDE Commands
Assert
Assert commands help in matching the expectations in the automated tests. We can match Text, Title, Values, Alerts, etc. If the assertion fails the test execution will be halted marking the test as fail.
Store
Store commands help in storing the values like text, title, from the web page and save it in a variable for use in future steps of the test.
Verify
Verify commands are the same as the Assert commands, however the main difference is that the Verify command is Soft assert, meaning that even if the assertion fails, it will carry on the test execution.
Wait For
Wait For commands help will wait for the certain condition to be met before the next line of test script is executed.
All the commands related to Selenium IDE can be found on this link.
Working with Selenium IDE
Installation
Selenium IDE comes as an extension for Chrome and Firefox browsers and can be installed using this link here. Once the installation is complete, click on the Extensions icon on the right hand top corner of the browser and select Selenium IDE from the Extensions list.
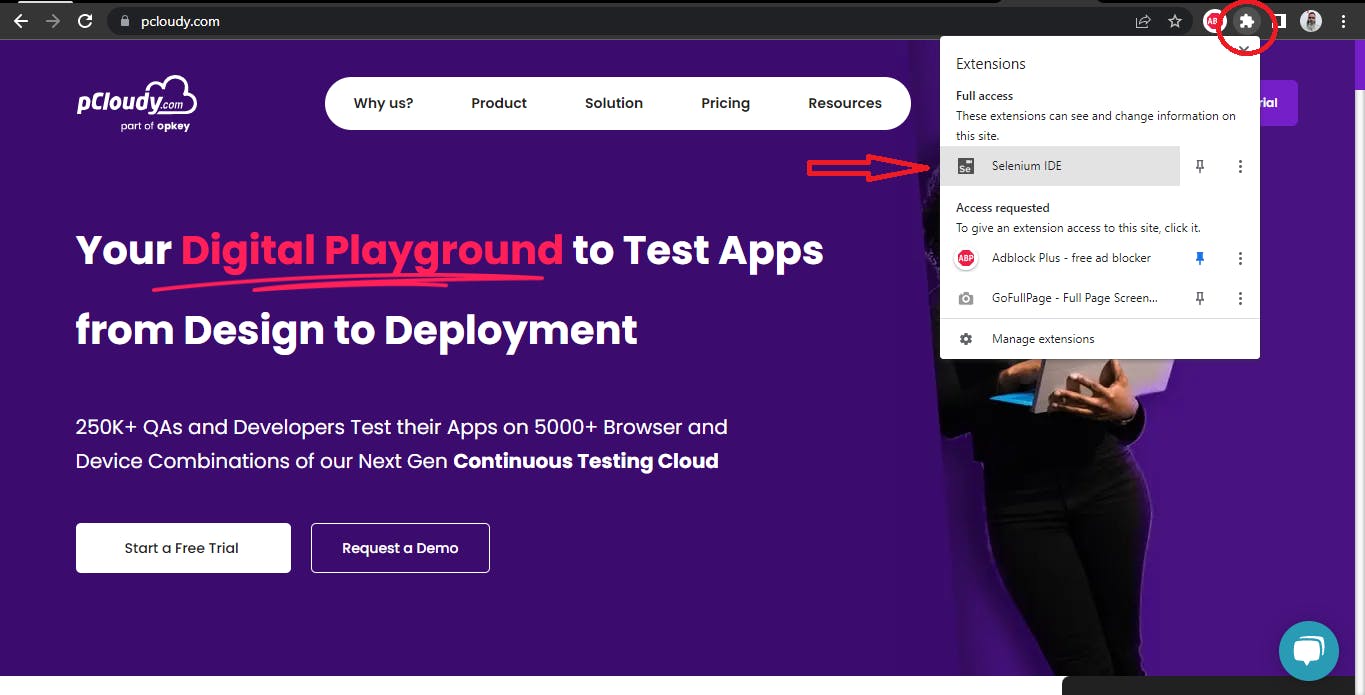
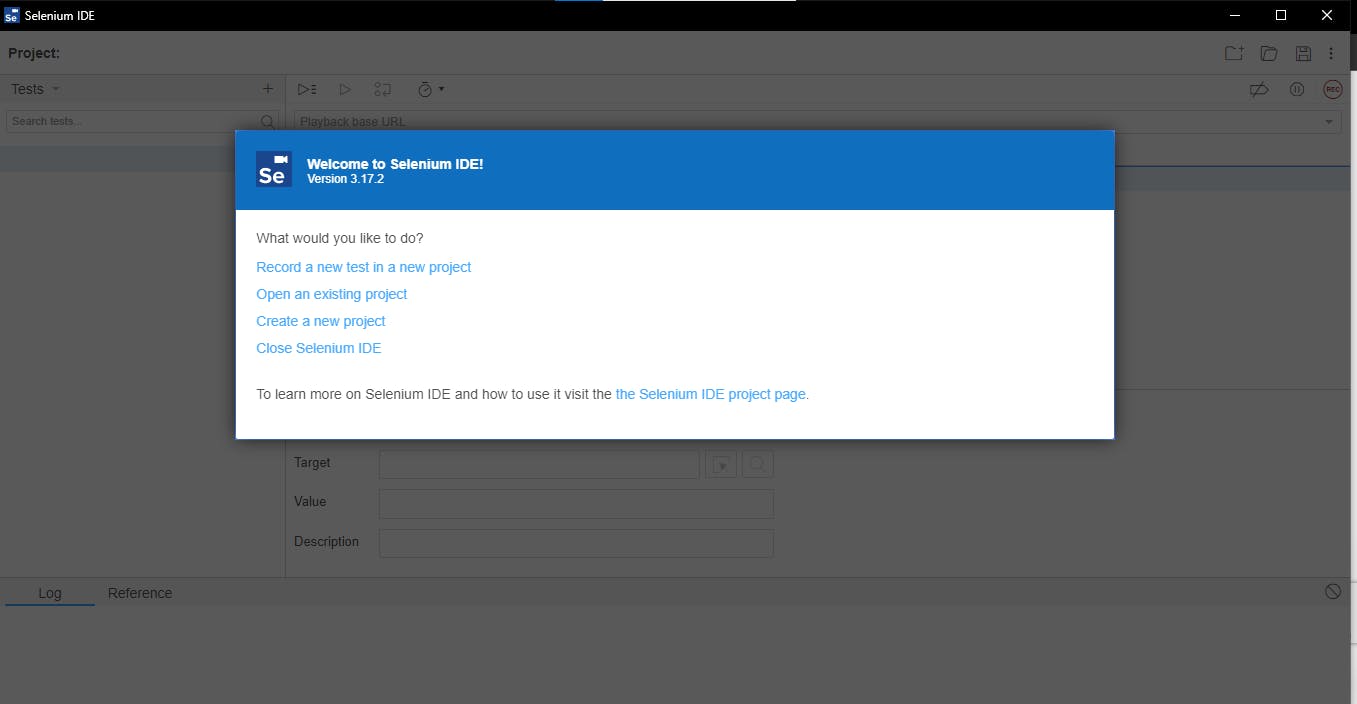
Click on the Extension Selenium IDE to start it. Following screen should be displayed:
Creating a new Project
To Create a new project click on Create a new project link as shown in the image above.
It will prompt you to add a name to the project in the next screen

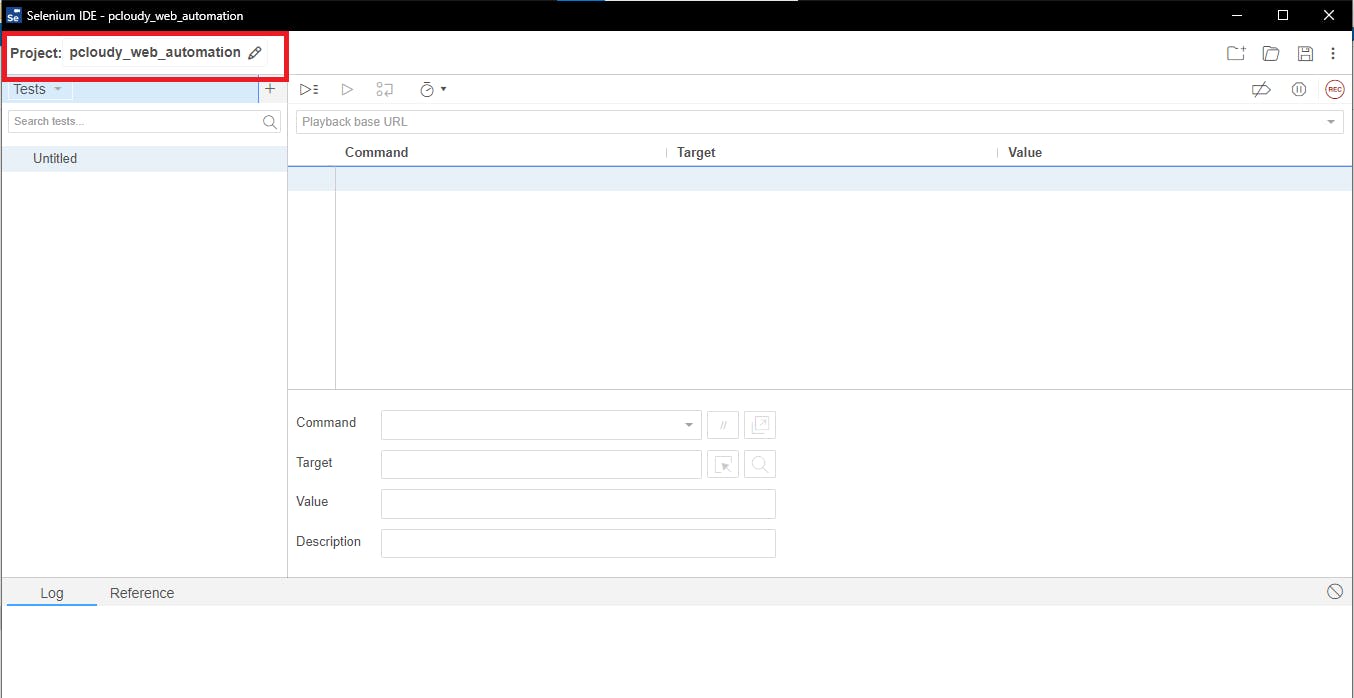
Add name to the project and click on the OK button. The project’s name should be displayed in the top left corner of the window once it is created successfully.
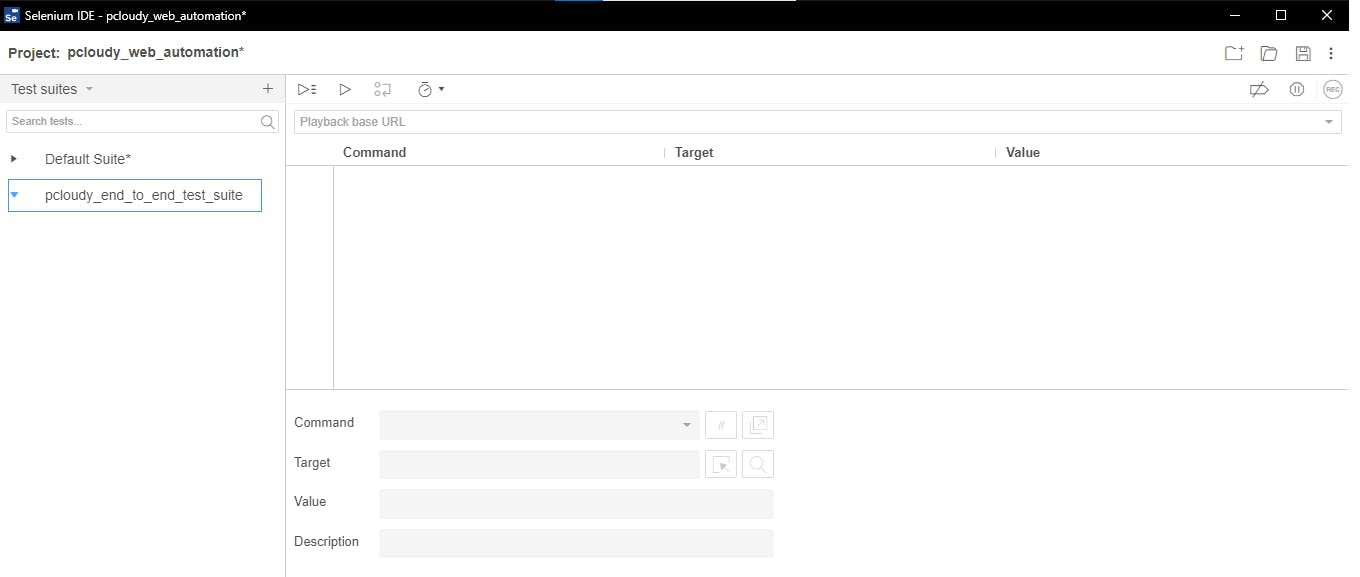
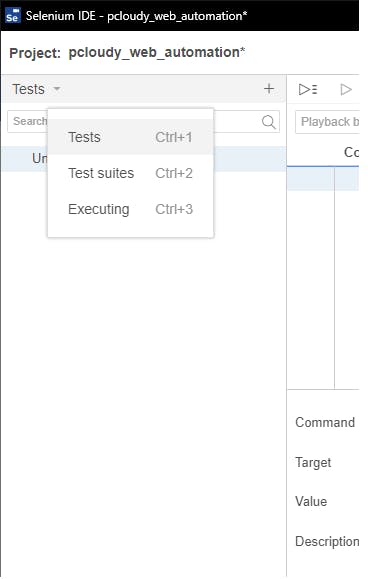
To create a test suite, on the left hand pane below the project name click on the dropdown and it will show a list of options – Tests, Test Suites, Executing.
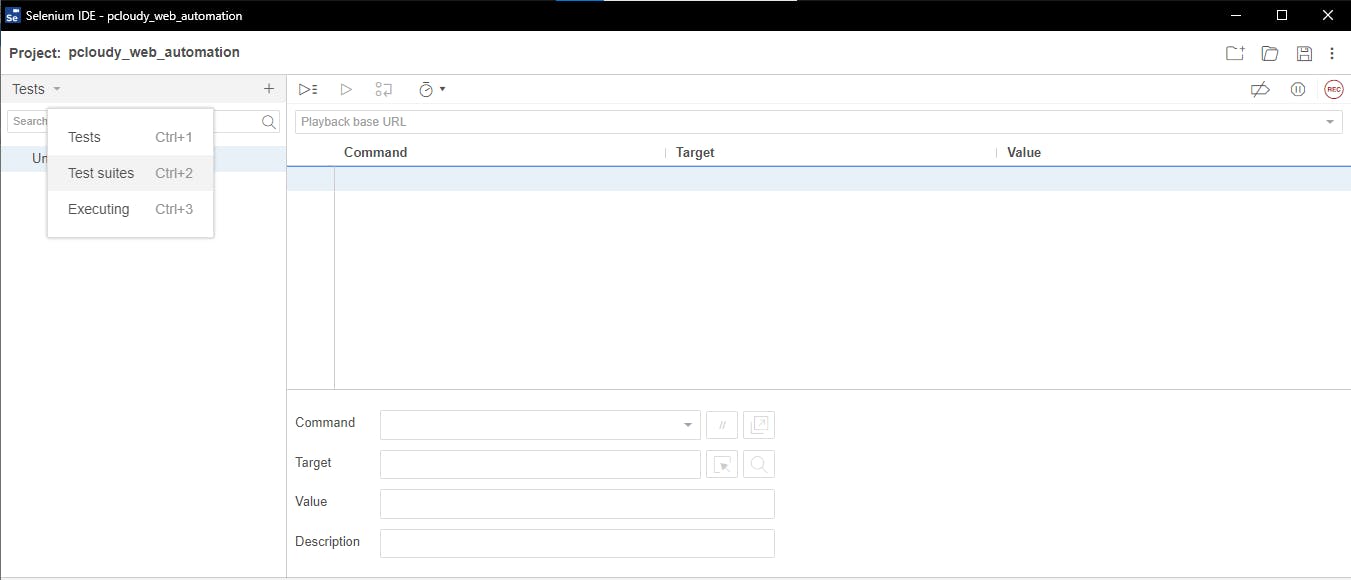
Select Test Suite and click on the “+” button next to it. It will open a dialog box and prompt you to enter the Test Suite name.
Enter the name of the suite and click on the ADD button. It will add a new suite which should now be visible on the left hand pane.
Creating a Test
For creating a test, click on the left hand pane dropdown and select Tests, next, click on the “+” button.
Add a name to the test and click on the ADD button.

Once the test is added successfully we can view it on the left hand pane as shown below in the screenshot:

Adding Test to Test Suite
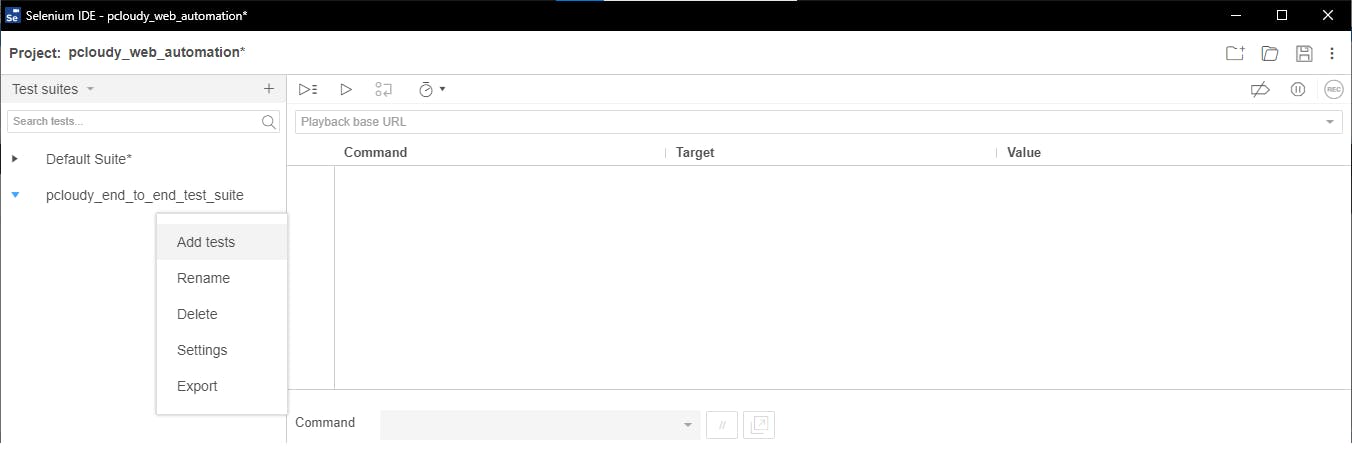
Selenium also provides an option to add a test case to the test suite, for doing that we need to switch to the Test-Suite and click on the three dots provided on the right side of the test suite name.

From the options click on Add Tests
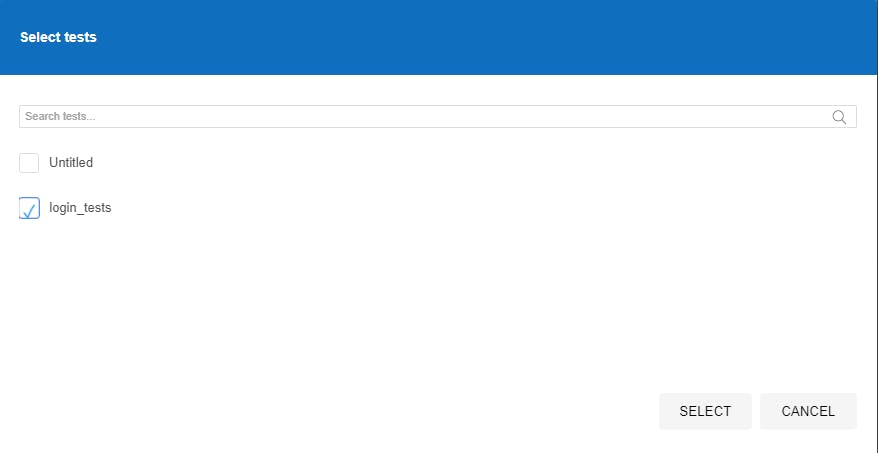
A message will be displayed to select tests which need to be added to the test suite. Option is provided to select Single or Multiple tests. Click on the Select button to proceed and complete the addition of tests.
Tests added to the Test Suite can be seen in the left hand pane

How to record and playback in Chrome browser?
Start Recording
To start recording, we first need to open the Chrome browser and navigate to the Extensions >> Click on Selenium IDE extension.

Click on the Start Recording button on the right hand corner of the IDE Extension.

Once the recording is started, we should be able to see the text “Selenium IDE is recording” on the web page.
Setting the Base URL
There are two ways we can set the Base URL in IDE.
While starting the recording
Using the Playback URL field.
Setting Base URL while Starting Recording
Once we click on the Start Recording button, a message will pop up if the base URL is not set, here we can provide the base URL and click on the Start Recording button to start the recording.

Using the Playback URL field
We can also set the base URL using the Playback URL field before starting the recording.

Recording a Scenario of navigating to the pCloudy blog web page and searching for a blog.
Let’s record a scenario where we navigate to the pCloudy blog page from the pCloudy website’s main page, assert the text blog on the page to make sure we are on the correct page. Next, using the search field we will search for keyword Selenium, click on the first search result and assert the title of the blog.
To record the tests we will be clicking on Start Recording button and go ahead with performing all the interactions with the elements on the web page, Selenium IDE will automatically note the steps as we proceed in the tests and also the element locators will be auto generated and set in the Target field of the respective step.
Test Script
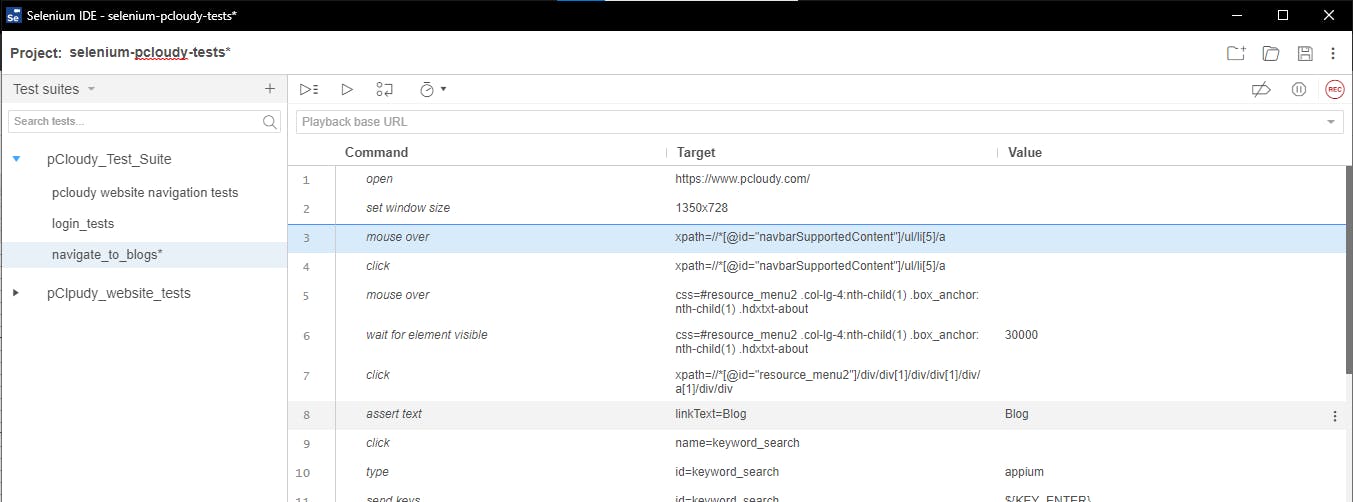
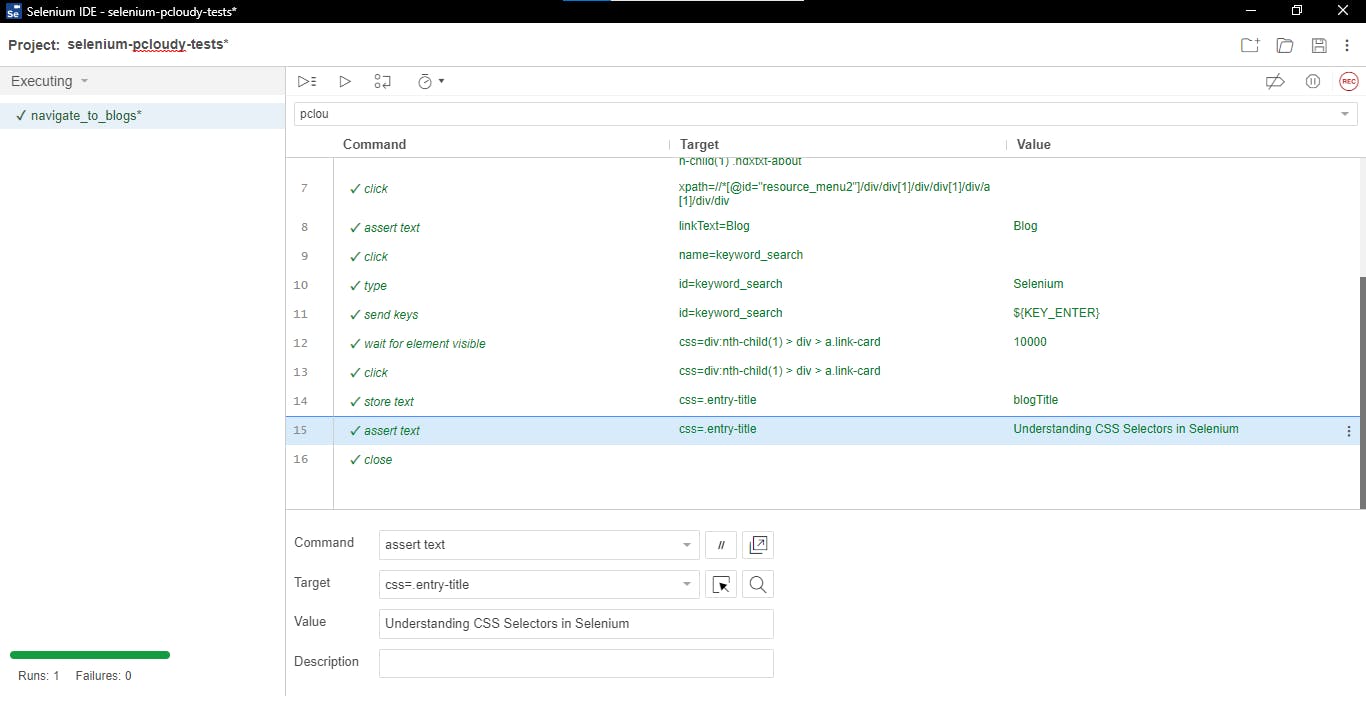
Here is the Selenium IDE recording script, let’s get into the detailed explanation
Steps to Record the test script
- Set the Base URL to pcloudy.com and click on Start Recording button
Open command is used to open the website. Set window size command will set the window size. Here window size is set as per the dimension of the window opened (1350*728).
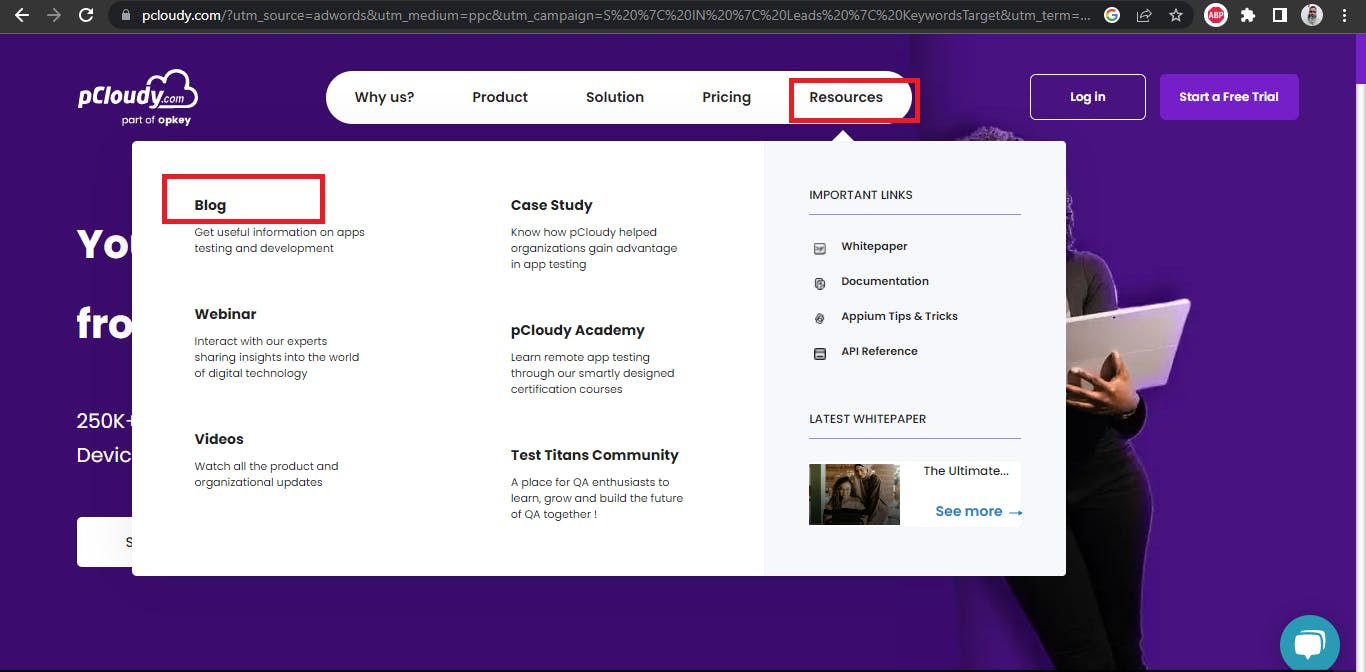
2. Hover the mouse to Resources menu using the mouse over command, it will open the menu, and click command will click on it. Mouse over command is again used to move the mouse to the Blog sub menu.
We have used the wait for element visible command as we need to for some time to make sure the Blog menu is available before we click on it. The time for wait is defined in the Value field (30000 milliseconds).
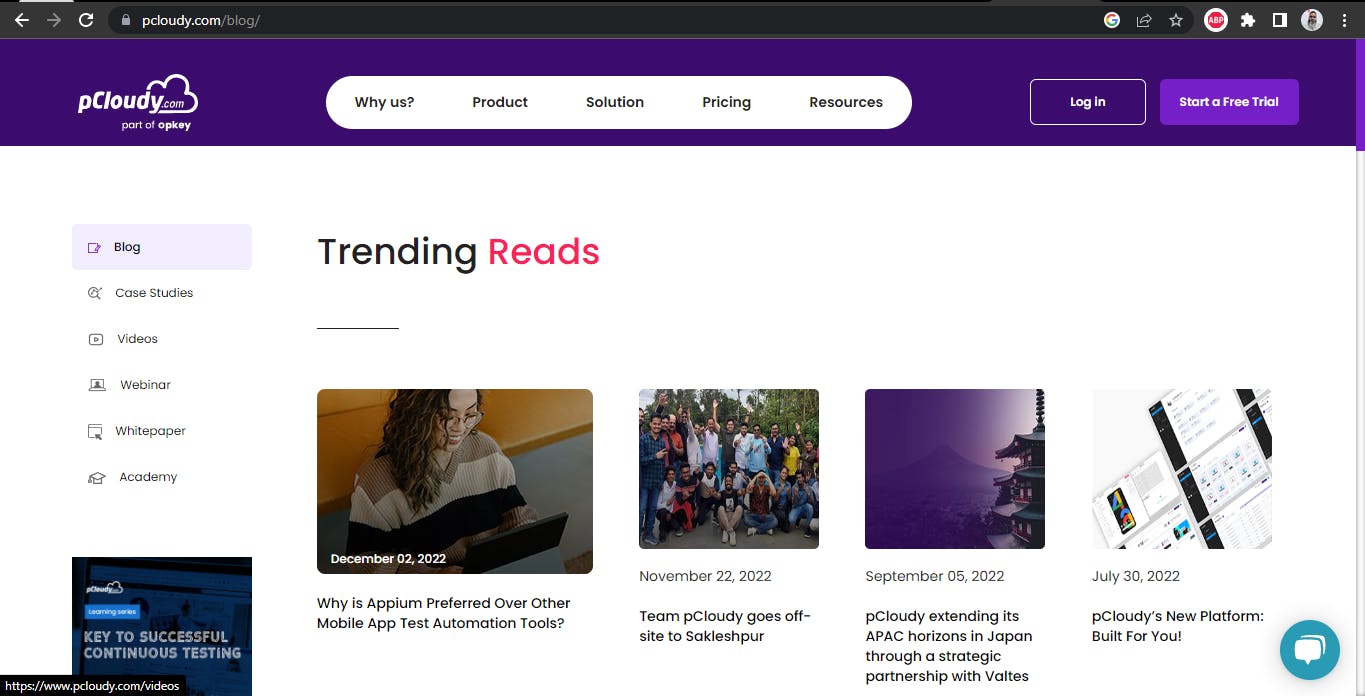
3. Assert the text “Blog” to check if we landed on the blog page correctly. Click,
Mouse over, send keys, etc, are all captured as we perform the respective actions. However, for Assertion/Verification and Wait For we need to manually select the respective commands while recording.
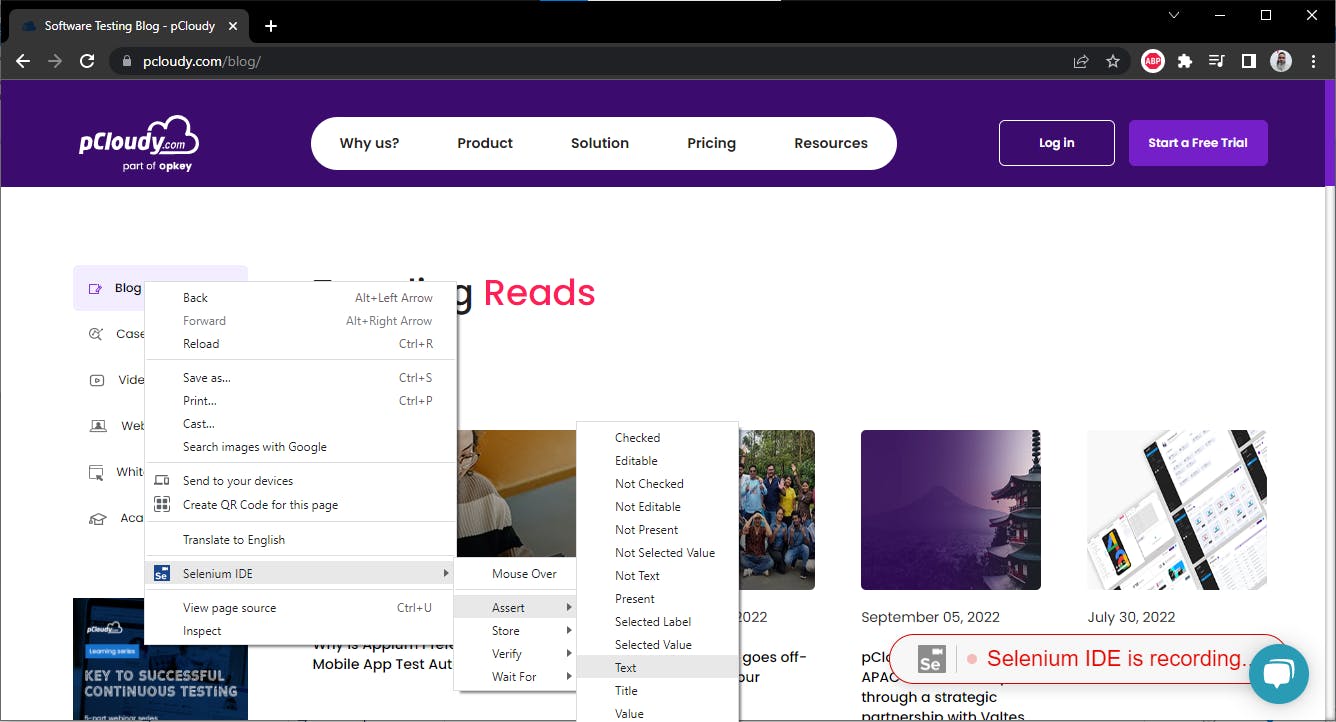
For Asserting text, Right click on the text we want to assert >> Select Selenium IDE from options >> Select Assert >> Select text. Likewise, we can follow the same steps for Verify and Wait For commands as well.
4. Next, we will be locating the Search field to enter the blog keyword to search for and enter the Text “Selenium” and press Enter Key to actually make the search work.
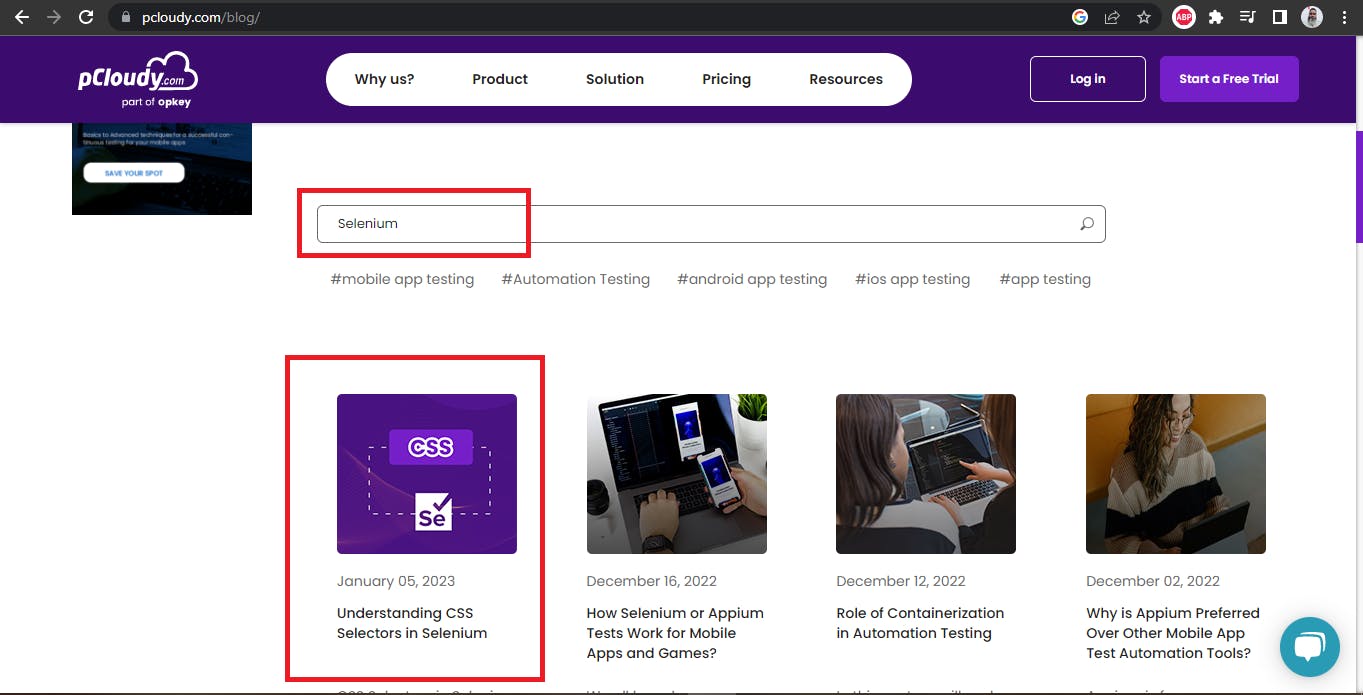
To type in the field, we will be using the send keys command and similarly to press enter key we will be using the type command and writing the commands ${KEY_ENTER} in the value field.
5. In the next step, we need to click on the first result of the search, however, we need to wait for the time the results get loaded hence we will use waitFor element visible command after the results are loaded we will click on the first search result.
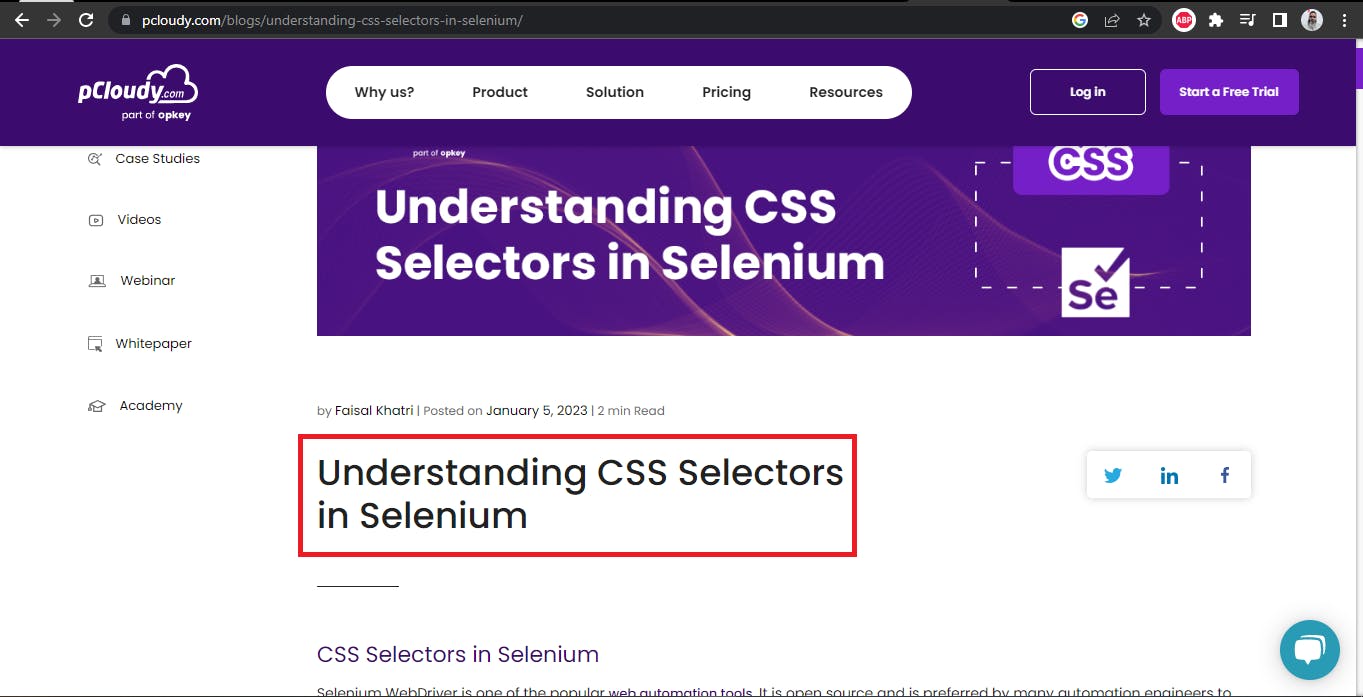
6. Finally the last step would be to assert the text of the blog title.
Running the Tests
Lets now learn how to run the tests.
Running all the tests
To run all the tests, click on the first button in the toolbar

Running current test
To run the current test, click on the second button in the toolbar.

Controlling the test execution speed
To control the test execution speed, we can use the third button on the toolbar.

On Clicking this button, a slider will open and allow us to adjust the execution speed before we run the tests.

Logs
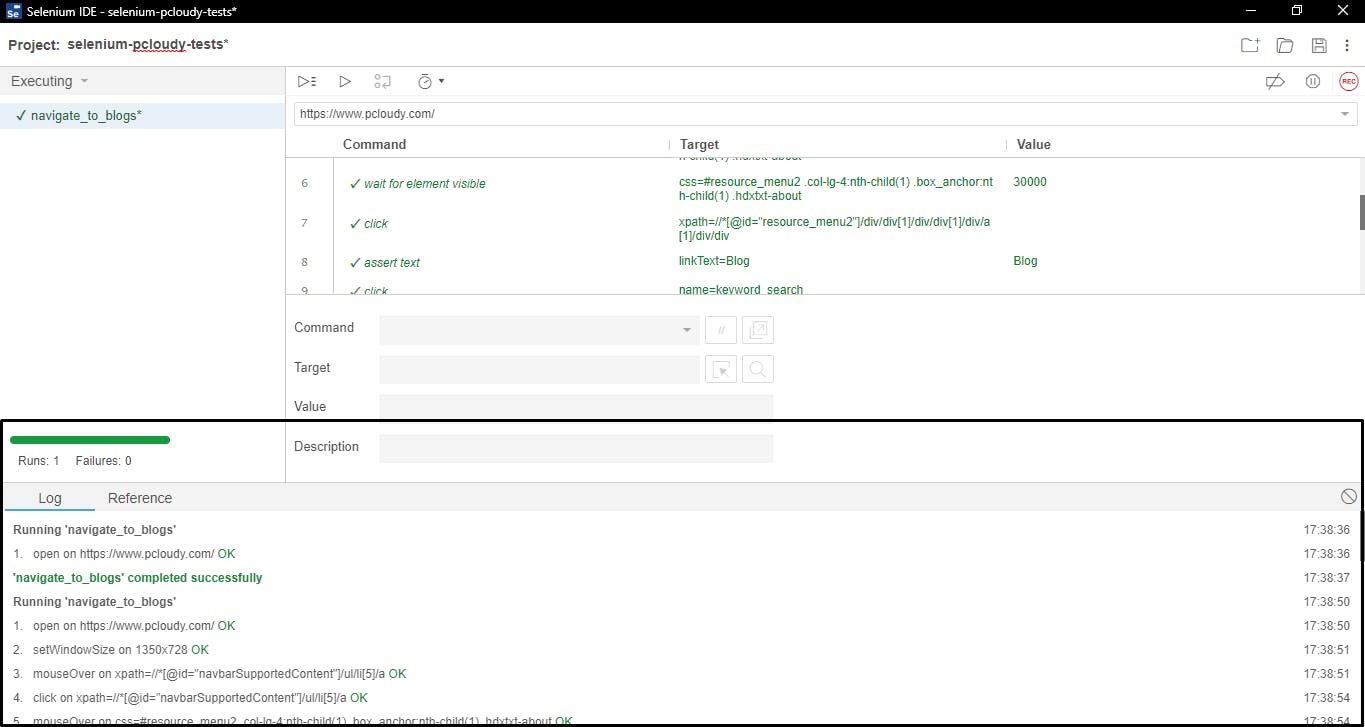
Once the tests are executed successfully, appropriate logs are generated in the lower section of the IDE which helps in providing insights on what all steps were performed in the tests. Also, in the left pane, we can see the count of the number of test runs and failures.
Summary
Selenium IDE is a record and playback tool which helps folks with no programming knowledge to automate the tests by recording the user simulation actions. It also has some limitations like it is browser dependent and does not support the automation of complex tests.
However it can be useful as a helping hand to automate the regression tests for manual testers by automating their repetitive testing tasks by simply recording using Selenium IDE.

